
Are you just getting started with Facebook Ads? If so, you need to learn about the Facebook pixel.
You may have heard people say that the FB pixel is confusing.
But even if it is, you would want to take advantage of it if you knew its massive potential for helping you succeed with paid ads. Allow me to show you its benefits in a while.
To keep it simple for you, I’ve prepared this guide that covers:
- What the Facebook pixel is
- Reasons you need to set it up
- How to add it to your website
You ready? Let’s get started.
What Is the Facebook Pixel and How Does It Work?
The Facebook pixel is a piece of JavaScript code that you install on your website. Some people call it the “retargeting pixel,” and here’s why:
It tracks the actions (called “events”) that people take on your website.
These people that reach your website can either come from a Facebook ad or an organic source like Google. You can use then use data that the FB pixel collects to retarget your previous site visitors with Facebook ads.
So imagine this:
Let’s say someone who’s doing a Google search on a pair of shoes landed on your website. That person viewed your shoe collection and then decided to add one item to a shopping cart.
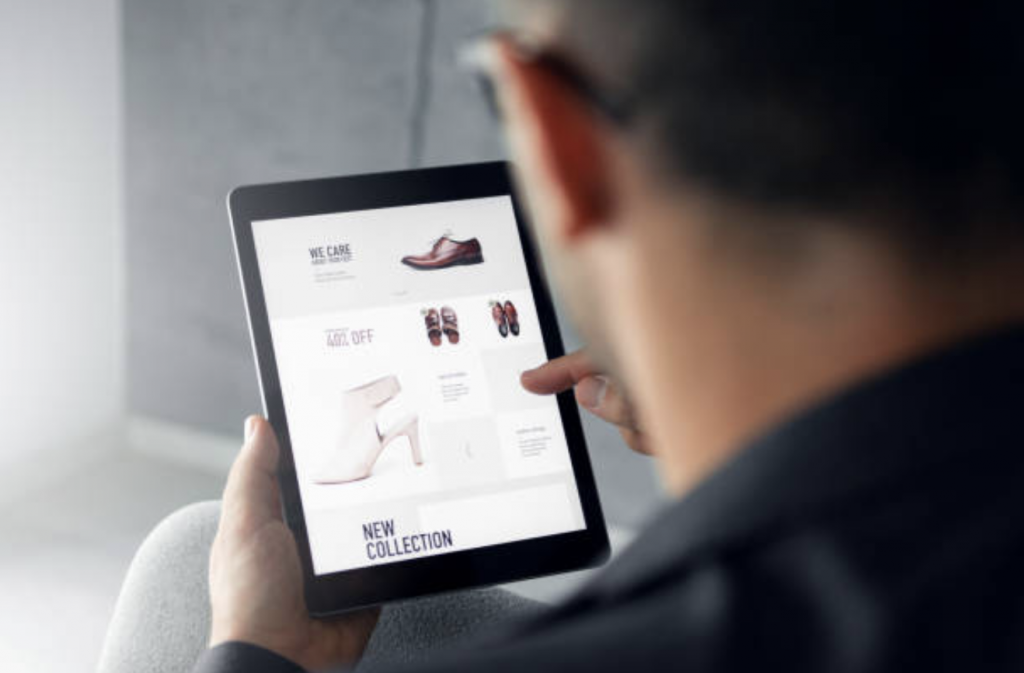
Now, the Facebook pixel has tracked that specific action.
But that’s not the only data that the pixel collects. It can track everything from your newsletter sign-ups to searches done on your website.
On that note, there are two categories of events that the Facebook pixel tracks. These are standard events and custom conversions. Let’s discuss each category below.
Standard events
As the term implies, standard events are the events that are already pre-defined by Facebook. To date, there are 17 standard events which include:
- Add payment info – Someone fills out their payment information upon purchasing your item.
- Add to cart – Someone adds an item to their shopping cart.
- Add to wishlist – Someone adds an item to a wishlist.
- Complete registration – Someone signs up for your email list, webinar, or another offer by completing a registration form.
- Contact – Someone contacts your business via email, chat, etc.
- Customize Product – Someone selects specific attributes of a product such as a color or size.
- Donate – Someone visits your donation page and donated.
- Find Location – Someone looks up your local store with the intention of visiting it.
- Initiate checkout – Someone clicks the checkout button to buy your product or service.
- Lead – Someone submits their information, allowing you to contact them in the future.
- Purchase – Someone completes a purchase on your website and receives a purchase confirmation or receipt.
- Schedule – Someone books an appointment at your location.
- Search – Someone performs a search on your website using your search bar.
- Start trial – Someone signs up for a free trial of your product or service.
- Submit application – Someone applies for your program or service.
- Subscribe – Someone pays for a subscription of your product or service.
- View content – Someone views a page on your website. (Take note that this standard event does not track a person’s actions on the page.)
Custom conversions
Meanwhile, custom conversions can track actions that are not part of the standard events. With custom conversions, you can get more specific data because you can now track more specific actions.
For example, let’s say you want to track the purchases made on your summer sneaker collection, bags, and hats. You also want to know the total $ value for those purchases.
Well, guess what? You can do those using custom conversions.
(Bottom line: In a nutshell, the Facebook pixel allows you to understand your potential customers better and get a full picture of their journey!)
Why Do You Need the Facebook Pixel?
Setting up the Facebook pixel benefits your business in many ways. Aside from giving you essential information you can use to create successful Facebook ads, it can boost your ROI.
Let’s get into the specifics.
1. Build website custom audiences to retarget.
Using the Facebook pixel, you’ll be able to show targeted Facebook ads to people who’ve previously been to your website.
This strategy is called retargeting, and it strengthens brand recall. As you can tell, it also helps you move people further down your sales funnel.
Consider this example:
You want to run a campaign where you’re going to retarget every person who has visited your pricing page but left even without trying the free version of your tool.
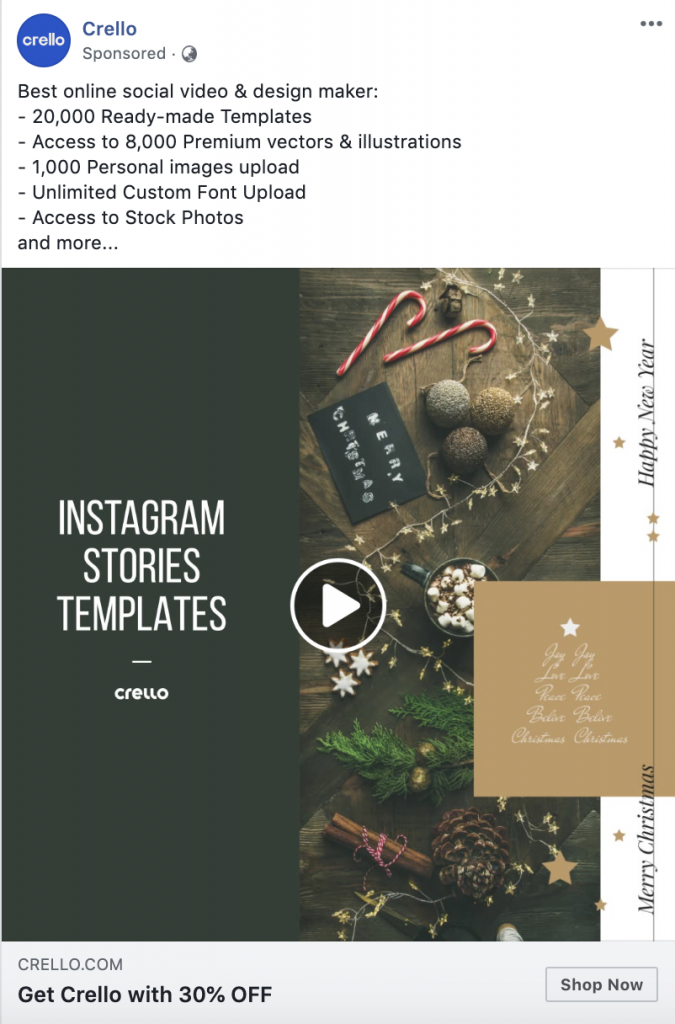
The screenshot above is an example of an ad that Crello retargeted me with. They also considered the time of the year (nearly December) by showing me Christmas and New Year templates.
2. Create lookalike audiences.
Would you like to reach more people who are similar to your previous customers? This is where Facebook Lookalike Audiences come in.
A lookalike audience is basically an audience that shares similar qualities with your existing audience. To create a lookalike audience, you need a source audience such as your custom audience.
3. Track the success of your Facebook ads.
When we run Facebook ads, don’t we want to find out if they worked? With the pixel code installed on your website, you’ll be able to track the conversions that resulted from your Facebook ad campaigns.
In fact, you can even track people through the device they use. You’ll know if they’ve seen your ad from their mobile device and switched to a desktop device to buy your offer.
4. Get repeat customers.
Increasing your business revenue isn’t only done by acquiring new customers. How about those who already bought from you? Repeat customers are profitable as well.
If you run an ecommerce business, here’s what you should know:
A study by Yotpo revealed that almost 15% of all online shoppers are repeat customers.
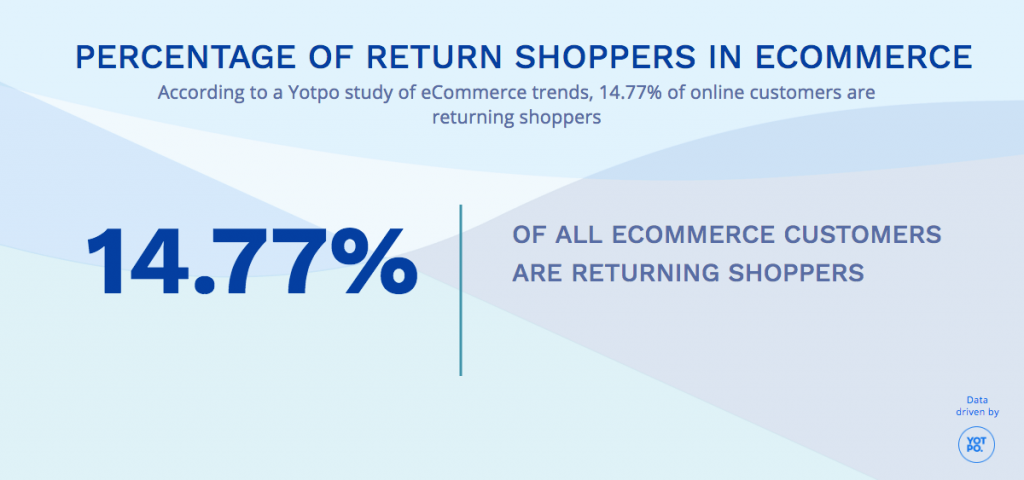
Now, you might think this is just a small percentage. However, repeat customers are easier to sell to. This is something that businesses should not ignore. If they bought from you, they’re likely to buy again.
But here’s the key: You need to leverage retargeting to gain repeat purchases. (Thanks to the Facebook pixel, that is now possible.)
5. Better optimize your ad campaigns.
As the pixel gathers information about how people use your website, you’ll be able to use that data to boost underperforming ad campaigns.
You may even realize that you need to improve your landing page, website, or offer based on your current conversions.
How to Add the Facebook Pixel to Your Website
Now that you know what the Facebook pixel is and how it helps your business, it’s time to install it on your website.
1. Create your pixel.
First, head over to Facebook Events Manager and click Pixels to start creating a pixel. When naming the pixel, choose a name that represents your business.
![]()
2. Add the pixel code to the back-end of your website.
Once you’ve created your FB pixel, you’re now ready to add the code to your web pages. Depending on your experience, you have one of three options:
![]()
Add code using a Partner Integration
Do you use a website or an ecommerce platform like WordPress, Shopify, BigCommerce? If that’s the case, you don’t have to manually update your code. Facebook’s article will show you how to do it.
Manually add pixel code to website
You need to find the header code of your website so you can copy and paste the pixel code at the bottom of the header section. Check out the example below from Facebook:
![]()
Email instructions to a developer
If you have no access to your website code or you work with a developer, Facebook gives you a set of instructions which you can simply send to the developer.
3. Check that your Facebook pixel is working.
Before you go, you want to make sure that the pixel is working correctly.
To do that, you need to add a troubleshooting tool called the Facebook Pixel Helper to your Google Chrome browser. Here’s a screenshot:
![]()
The Pixel Helper tells you:
- If a page has a pixel installed in it
- How many pixels are on the page
- The events found on the page
- Whether the pixels are working correctly.
If there is a problem with your pixel, Pixel Helper will show an error message so you can fix the issue.
Take Your Facebook Retargeting to the Next Level
I hope you learned about the Facebook pixel in today’s guide!
Are you thinking of using the Facebook pixel for retargeting so you can achieve your business goals? ?♂️
I’m here to tell you that there is a more advanced way to retarget those who visit your website. My team and I have created a tool called ConnectRetarget.
While the Facebook pixel shows you behaviors that people take so you can retarget them, ConnectRetarget reveals more specific behaviors such as:
- The time people spend on your website
- How far they scrolled through your page
- Specific dates they visited your pages
Here’s a sneak peek of ConnectRetarget’s drop-down interface:

Learn more about ConnectRetarget right here!
Have you got thoughts about the Facebook pixel or retargeting? Share them in the comments section below.